Friday, May 22, 2015

Pan Fried Chicken Thighs with Roasted Young Potatoes

Hi my lovely friends! Here is another chicken and potato recipe for you! As you have already noticed my family members are all obsessed with both chicken and potatoes, so I make such easy but quite delicious chicken and potato recipes fairly often. Here is how they turned out this time!!! They were very flavorful and delicious and, I think, they looked super appetizing, too!!!


Here are the ingredients for today's recipe. 
For the pan fried chicken thighs: 
  • chicken thighs (1 kg)
  • fresh garlic with green leaves (1-2 pieces, about 2 tablespoon in chopped form)
  • onion (1 medium size)
  • apple vinegar (3 tablespoon)
  • vegetable oil (3 tablespoon)
  • salt (to your taste)
  • black pepper (to your taste, I am using 1/2 teaspoon)
  • paprika (1 teaspoon)
  • chili powder (to your taste, I am using 1/3 teaspoon)
  • ginger powder (1/2 teaspoon)
  • cumin (1 teaspoon)
  • green onions (1 tablespoon chopped for garnishing)
For the roasted young potatoes:
  • young potatoes (1,5 kg)
  • vegetable oil (4 tablespoon)
  • salt (to your taste)
  • black pepper (to your taste, I am using 1/2 teaspoon)
  • paprika (to your taste, I am using 1 teaspoon)
  • chili powder (to your taste, I am using 1/3 teaspoon)
  • green onions (1 tablespoon chopped for garnishing)
Now let's talk about the instructions:
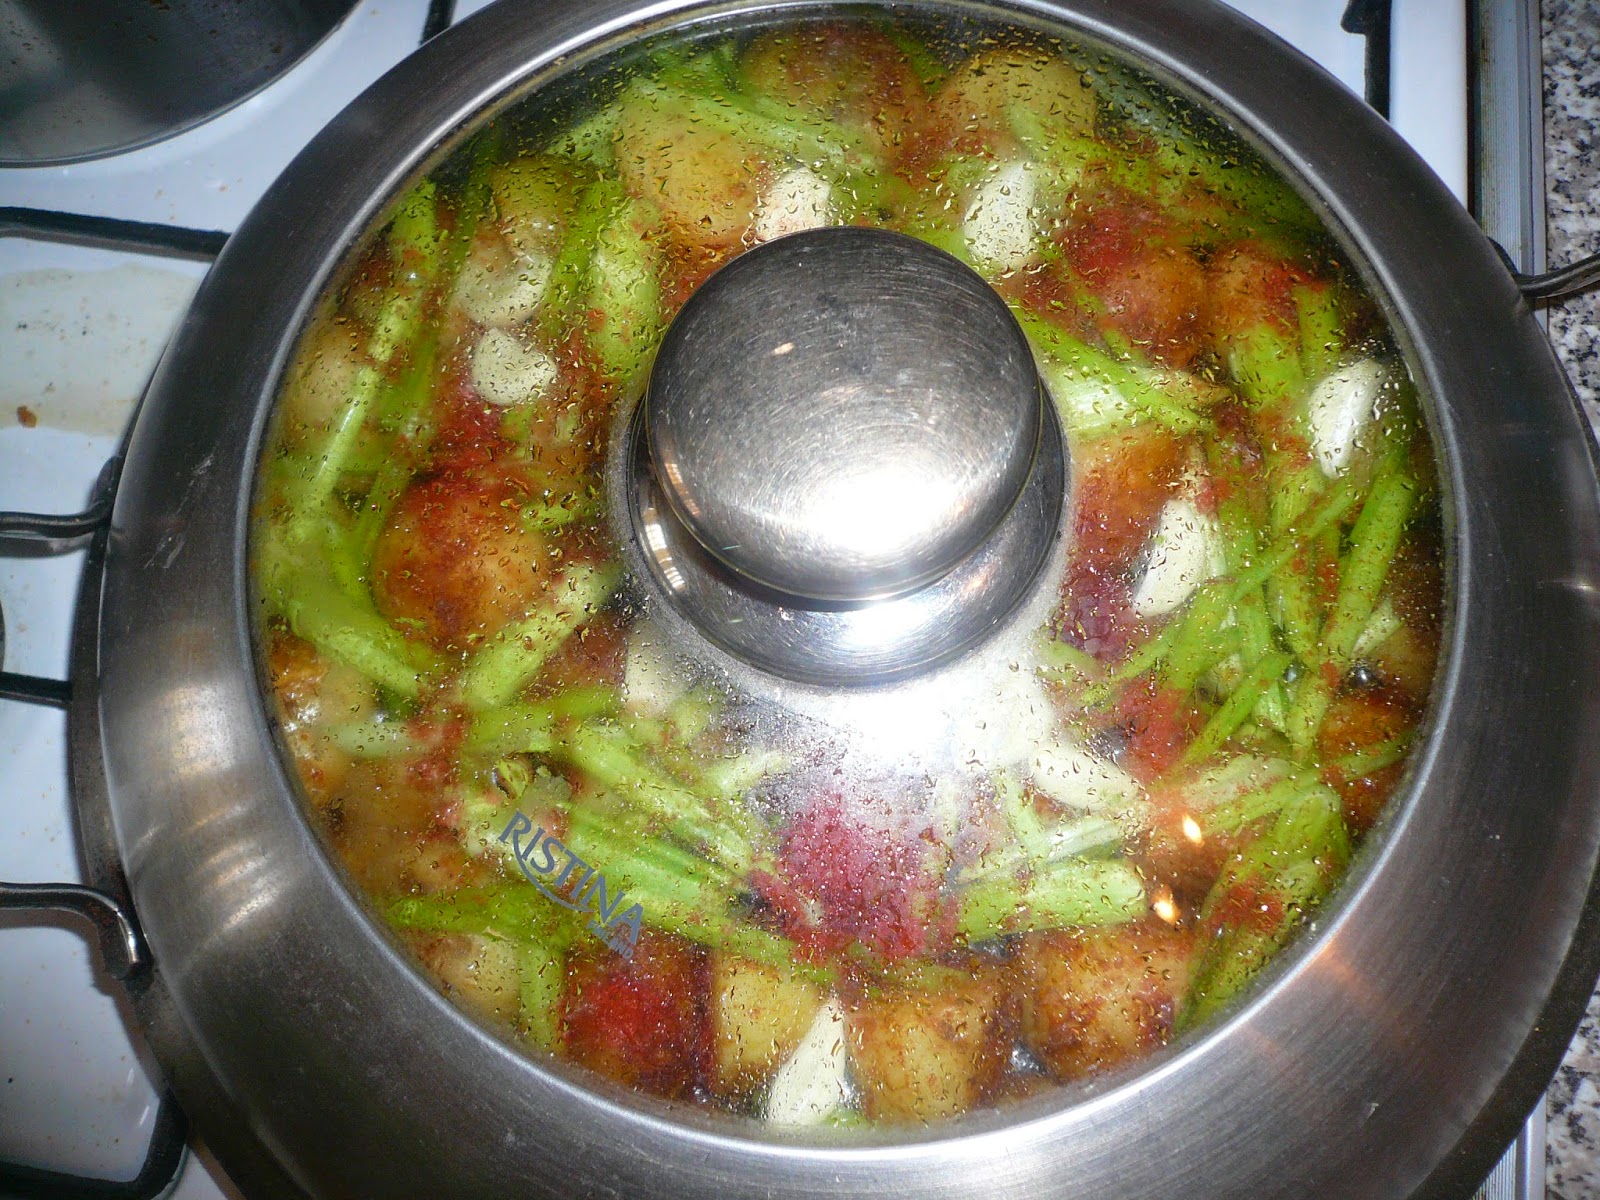
  • First of all you should marinade the chicken thighs. I recommend you to marinade the chicken thighs the night before. That will save you a big amount of time and the chicken thighs will have a better chance to get marinaded thoroughly. In order to marinade the chicken thighs, first of all you should wash and dry the chicken thighs. Put them in a bowl and season them with salt, black pepper, paprika, chili, ginger, cumin, vegetable oil and the vinegar. Stir them thoroughly. Chop the  fresh garlic (the green leaves too) and the onion into very small pieces. Add them to the chicken thighs and give them another good stir. Cover the bowl with a lid or a plastic film and let them marinade in the fridge for a couple of hours or even better the whole night. 
  • As the chicken thighs are getting marinaded you can wash the young potatoes, giving them a good scrub under warm tap water. Drain them properly and put them aside. 
  • When the chicken thighs are marinaded, take them out of the fridge, heat a pan on a medium heat and flop over the chicken thighs, together with the marinade. Cover the pan with a lid and cook them for about half an hour.  


  •  As the chicken thighs are being cooked, heat another big pan on a medium heat, add the vegetable oil and the young potatoes, stir them, cover with a lid and cook for about 15 minutes. When the potatoes are half cooked season them with salt, black pepper, chili powder, paprika and stir them again. Continue roasting the young potatoes with the lid open until they get thoroughly cooked and perfectly roasted. That will take you another 15-20 minutes. 


  •  Meanwhile don't forget about the chicken thighs. Stir them from time to time and fry them with the lid open, until they are cooked through and perfectly roasted. That will take you about 20 minutes. When both the chicken thighs and young potatoes are beautifully roasted, put them in a platter and sprinkle them with chopped green onions!!! That's all, the dinner is ready!!! : ): ): )


 I truly hope you like today's recipe! Have fantastic day! Bye!!! :) :) :)

Flag Counter

Monday, May 18, 2015

Zucchini Fritters and A Very Simple Beetroot Salad

Hi everyone!!! I prepared these beautiful zucchini fritters and a very simple beetroot salad for my family for Sunday brunch and decided to share the recipe with you. The zucchini fritters turned out very crispy and delicious (the big platter full of zucchini pancakes was emptied within a few minutes (:) ), the beetroot salad was very flavorful and looked very inviting too!!! If you want to know the details of the recipe and the step by step instructions just keep on reading the recipe below!!!


For the zucchini fritters you will need the following ingredients:
  • zucchini (800 gram)
  • onion (1 medium size)
  • garlic (2 cloves)
  • coriander (1 full tablespoon of chopped coriander, you can also use dill and parsley)
  • egg (2 medium range)
  • salt (to your taste)
  • black pepper, chili powder, paprika (to your taste)
  • plain flour (5 tablespoon)
  • vegetable oil (enough to fry all the zucchini fritters  )
For the beetroot salad:
  • beetroot (4-5 small size)
  • sour-cream (200 gram)
  • garlic (1 clove)
  • apple vinegar (1 tablespoon)
  • vegetable oil (1 tablespoon)
  • salt (to your taste)
  • black pepper, chili powder, paprika (to your taste)
  • coriander (1 tablespoon of chopped coriander)
Now let's talk about the instructions:
  • Wash and grate the zucchinis, sprinkle them with salt, press the substance thoroughly to get rid of the excess juice. There is going to be a lot of excess juice. 
  • Chop the coriander, the onion and the garlic into very small pieces. You can use a garlic press to squeeze the garlic cloves if you want. Add them all to the grated zucchini bowl.

  • Crack the eggs into the mixture, season with salt, the black pepper, the paprika and with chili power.  Add the flour and mix it thoroughly. You will get a batter like this
  • Heat a pan on a medium heat, add enough vegetable oil to cover the surface of the pan and fry the zucchini fritters. When one side is done, flip over and roast the other side!
  • Place a paper towel on the plate to absorb all the excess oil. Put the fried zucchini fritters on the paper towel. If you don't have a paper towel use a couple of plain napkins. Fry all the zucchini fritters like this. It will make several batches. I don't know exactly how many fritters I fried but it was enough to feed 4-5 people. :) :) :)

This is how you make the beetroot salad:
  • The beet roots I am using in the recipe I have cooked the night before. If you don't have already cooked beetroot I advise you to cook it while you make the zucchini fritters because it takes a while to be cooked (about 30-40 minutes). 
  • After you have cooked the beet roots, the rest is very simple and will take only a few minutes. Slice the beet roots into medium slices and marinade them with apple vinegar, vegetable oil, salt and peppers and squeezed garlic for about 15 minutes. You can marinade the beet roots the night before. It will save you a bunch of time!  
  • Place the beetroot slices on a plate, put a teaspoon of sour-cream on top of each and sprinkle with chopped coriander. 

I hope you like today's recipe post! Wish you all have a fabulous week ahead! Bye!!! :) :) :) 

Flag Counter

Friday, May 15, 2015

Spaghetti with Chicken and Mushroom Sauce, Veggie Salad

Hi friends! Todays I am going to share a scrumptious and flavorful pasta and sauce recipe with you. In general, I love pasta, and this particular recipe is on the top of my favorite pasta recipe list. The sauce itself is very delicious, flavorful and creamy and it can be used not only with different kinds of pasta but also with rice, buckwheat, couscous, etc. The veggie salad is very simple and easy to prepare but it complements the spaghetti very well and adds crispiness and freshness to the main dish! This is how the main dish and the veggie salad turned out!!! Don't they look super and appetizing?! And they tasted delicious too :) :) :) If the whole idea of the meal interested you just keep on reading the recipe below!!!


Now let's talk about the recipe. You will need the following ingredients:
  • spaghetti (400 gram)
  • salt (1 full tablespoon, dissolved in water for cooking the spaghetti )
  • vegetable oil (2 tablespoon, use olive oil if you like)
For the sauce:
  • chicken breast (400 gram)
  • mushroom (I am using champignons) (400 gram)
  • sour-cream (100 gram)
  • onion (1 small size)
  • garlic (2 cloves)
  • ketchup (1 full tablespoon)
  • vegetable oil (1-2 tablespoon)
  • salt (to your taste)
  • black pepper and chili (to your taste)
  • paprika (1 teaspoon)
  • cumin (1 teaspoon)
For the veggie salad:

  • young seasonal cabbage (1 cup shredded)
  • cucumber (1 medium size)
  • carrot (1 medium size)
  • reddish (5 medium size)
  • onion (1 small size)
  • herbs (I am using dill, coriander, tarragon, you can also use parsley, basil or any kind of herbs you like)
  •  vegetable oil (1 tablespoon)
  • apple vinegar (1 tablespoon)
  • salt (to your taste)
  • black and red peppers (to your taste)
Now the instructions:
  • First of all you should make the sauce because it takes a little while to be cooked. While you make the sauce put a big pot full of water and put it on a heat and bring to boil. 
  • Wash and slice the chicken breasts into thin pieces. 
  • Though I know that I shouldn't wash the mushrooms but I wash them anyways and peel the skin from the champignon hats - but this is optional, you can totally skip this part. Cut the champignions into slices too. 
  • Chop the onion and the garlic cloves and the herbs into small pieces. 
  • Then take a pan, add the vegetable oil, heat it. Then add the chopped onion and the garlic cloves and salute (roast) them for a few minutes. Then add the cut chicken breasts, stir them and cook for about 15 minutes under the lid. 
  • When the chicken breasts are halfway cooked add the sliced champignons, stir them together, add the ketchup, season with salt, black and red peppers, paprika, cumin, a little bit of herbs and let them cook for another 15-20 minutes or until everything is perfectly cooked. Before you take the sauce away from the heat, add the sour-cream and the rest of the herbs, bring it to boil and turn off the heat.  
  • Meanwhile the water for spaghetti will definitely be boiling. Add 1 full tablespoon of salt to the water, mix it throughly and add the spaghetti. Cook the spaghetti "al dente" taking into consideration the instruction of the package. It will take about 10-12 minutes to get it done.

  • As spaghetti is being cooked, make the veggie salad. Shred the vegetables into thin and long pieces. Then drizzle them with the following dressing. Add the vegetable oil, the apple vinegar, salt and peppers into a small jar, cover it with the lid and shake it thoroughly. Voilà the dressing is ready. Drizzle it on top of the vegetables and give it a good stir. The salad is ready.

  • As you have cooked all the comprising parts of the meal, now you can assemble them together. This is how my plate turned out!  I decided to serve the salad in a separate dish because I didn't want to ruin the way my spaghetti looked! :) :) :)


I truly hope you like the recipe! Wish you all have a fabulous day! Bye! :) :) :)

Flag Counter

Wednesday, May 13, 2015

Quick and Delicious Lunch Idea with Veggie Salad, Pan-Fried Potatoes and Fried Eggs


Hi everyone!!! One of the most beloved and quickest meals that my family have always been enjoying eating is this very simple but very delicious lunch, which I tend to prepare, I guess, quite often!!! :) :) :) I cook this type of lunches so frequently that I decided to share it with you!!! Hope you don't mind it! :) :) :) This recipe will take you about 30 minutes to prepare or even less, from preparations to the serving but, I assure you, you'll enjoy every bite of it. The crispy and crunchy salad with a bunch of pan-fried potatoes and a fried egg make a flavorful and palatable combination together. This is how the lunch turned out!!! It looks very appetizing, don't you agree with me!!! :) :) :) If you got interested, just bear with me and keep on reading the recipe!!! :) :) :) 


To make this simple but super delicious lunch you'll need the following ingredients.
For the salad:
  • cabbage ( 1 cup of shredded cabbage, I am using freshly grown seasonal cabbage; it has much tender leaves)
  • cucumber (1 small size, 1/2 of a cup chopped cucumber)
  • onion (1 small size, or 1/2 of a medium size) 
  • carrot (1 small size, or 1/2 of a medium size) 
  • beetroot (1 small size,or 1/2 of a medium size)
  • lettuce (just a few (4-5) leaves)
  • vegetable oil (1 tablespoon, use olive oil, if you like)
  • apple vinegar (1 tablespoon)
  • salt (to your taste)
  • black pepper, paprika (to your taste)
For the pan-fried potatoes:

  • potatoes (4 medium size)
  • garlic (2 cloves)
  • vegetable oil (3-4 tablespoon; you can use less if you feel like it :) :) :) 
  • salt (to your taste)
  • paprika (1 teaspoon)
  • black pepper (to your liking, I am using 1/3 teaspoon)
For the fried eggs:

  • eggs (4 medium range)
  • vegetable oil (1 tablespoon)
  • salt (just a pinch)
  • paprika (just a pinch)
  • black pepper (just a pinch)
Now let's talk about how to prepare the lunch:

  • First of all you should pan fry the potatoes. Wash, peel and chop the potatoes first. Then heat a pan on a medium heat, drizzle it with vegetable oil and add the chopped potatoes. Close the lid and cook them for about 10 minutes under the medium heat.

  • Meanwhile make the vegetable salad. Shred the cabbage, chop the lettuce leaves, the onion and the cucumber. Slice the beetroot and the carrot. Season the chopped vegetables with salt and peppers and drizzle with vegetable oil and the apple vinegar. Put the salad aside till the fried potatoes are ready.

  • Meanwhile the potatoes will be halfway cooked. Season them with salt and peppers. Add the chopped garlic. If you like sautéed onions, you can add chopped onions, too. Give them a good stir and roast the potatoes with the lid open for another 10 minutes.
  • While the potatoes are roasting make the fried eggs. Take another pan, put it on a medium heat and drizzle with vegetable oil. When the oil heats up, crack the eggs. Season them with salt and peppers. Cover the pan with the lid and fry them for about 5-7 minutes on a low heat.

  • As you fry the eggs, don't forget about the potatoes and give them another good stir. After roasting for about 10 minutes, they must be roasted perfectly. Turn off the heat and assemble the lunch together. Voilà the lunch is ready!!! :) :) :)  
  • This is how my plate turned out! Mmmm..., that was a delicious lunch!


I hope you'll like this lunch idea as much as I do!!! Have a fabulous day! See you next time! Bye! :) :) :)

Flag Counter

Monday, May 11, 2015

Chicken and Carrot Rolls (Lavash Rolls with Chicken and Carrot filling )

Hi, my lovely friends!!! If you have a little more time to spend on making your breakfast or lunch at the weekends prepare this amazing chicken and carrot lavash rolls. In general you can make this kind of rolls with different fillings.There are a large variety of lavash rolls with different fillings, but yesterday I made them with chicken breasts, carrots and cream cheese. They tasted amazing and looked gorgeous, too. You can make this rolls for different events and, I assure you, everybody from adults to kids will love them. If you can't find lavash (Armenian national bread) I think you can replace it with tortillas. I know that they are much smaller but you can use several and cut them in halves. The result will be the same. This is how my lavash rolls turned out. Aren't they super appetizing?!!! I made them for Sunday brunch with a cup of tea to accompany it.  They were very delicious, flavorful, crispy outside and soft inside and very filling too! :) :) :) I hope you will enjoy it as much as my family did!!!!


 Now let's talk about the recipe! You will need the following ingredients:
  • lavash (2 pieces - if you can't find it, replace it with a couple of tortillas, I think 4-5 tortillas will be enough)
  • chicken breasts (400 gram)
  • cream-cheese (250 gram)
  • carrot (1 big, or 2 medium size)
  • onion (1 medium size)
  • garlic (3 cloves)
  • dill (2 tablespoon of chopped dill)
  • vegetable oil (3-4 tablespoon, use olive oil if you like)
  • salt (to your liking)
  • black pepper (1/3 teaspoon, use more if you like)
  • chili powder (1/3 teaspoon, you can use more, if you like a little bit spicier)
  • paprika (1 teaspoon)
  • cumin (1 teaspoon)

Now let's talk about the instructions:
  • Cut the chicken breasts into small  and thin pieces. Marinade them with garlic, salt, black pepper, chili powder, paprika and cumin and 1 tablespoon of vegetable oil. You can marinade the chicken breasts the night before, that will save you a lot of time and will help you to make the roll very quickly the following day.
  • If you haven't marinaded the chicken breasts the night before, then just let it sit there about 20 minutes until you wash, peel and grate the carrots and cut the onion and the garlic cloves.
  • Heat a pan on a medium heat, add 2-3 tablespoon of vegetable oil. Sauté the chopped onion and the garlic cloves. After a few minutes add the marinaded chicken breasts, roast them a little bit and cook thoroughly under the lid for about 20 minutes. Then add the grated carrots and half of the chopped dill. Stir the mixture and taste it to see if you need to add a little bit more salt or not. Cook it for a few minutes, then take the pan off the heat and let it cool down a little bit. 
  • Meanwhile preheat your oven to 200 degree Celsius and prepare the lavash. Layer one lavash on top of the other and spread it with cream cheese. We are using two pieces because they are quite thin and can easily tear while we roll them. If you use tortillas just use 1 layer because they are thicker and won't tear. 

  •  When the chicken and carrot filling is cooled down a little bit, spread it on top of the cream-cheese. Then sprinkle it with the remaining chopped dill. 


  •  As you have layered everything, it's time to roll the lavash diagonally from one end to the other very firmly.


  •  Take a chopping board and cut the roll into individual portions like this.You can eat this rolls even without baking them in the oven, as all the ingredients   are already cooked. But I personally like to grill them in the oven and serve them hot and crispy.

  •  Take a baking tin and place them accurately on it.
  •  Grill the rolls in the oven for about 15 minutes or until they turn yellowish-golden color. Place them on a platter and serve them. The platter full of this deliciousness will be emptied in no time. :) :) :)  
  •  This is how my plate of chicken and carrot rolls looked like. That was a perfect brunch for me!!! I hope you will enjoy it too, if you choose to make it one day! 

And this is my two-year old son enjoying his roll!!! Have a fabulous day! Bye!!! :) :) :)


Flag Counter

Sunday, May 10, 2015

Making fiends in the park!!! :) :) :)


My son, Karen, loves to spend time outdoors finding new friends and playing with them. Today we went to a new park but unfortunately there weren't any kids of his age to play with. After playing by himself he finally met an adorable teenage boy who was reading a book under the shade of the trees!!! My son came up to the boy and was happy to make friends and play with him!!!


Flag Counter

Thursday, May 7, 2015

Cottage Cheese Cookies


Hello, my friends!!! Today I decided to share this simple cookie recipe with cottage sprinkled with caster sugar. Today we woke up earlier than usual and I decided to prepare some easy and simple cottage cheese cookies for breakfast. I had some cottage cheese in my fridge which would expire if I didn't use it. So I decided to incorporate it in this cookie recipe. They were warm and tasty and they went very well with a cup of tea. My son liked it too and even munched two cookies one after another, that was a great success!!! :) :) :) This is a very simple recipe, but anyway I decided to share it with. Maybe your kids will also love it!!!


For this simple cookie recipe you will need the following ingredients
  • cottage cheese (200 gr)
  • plain flour (4 cups)
  • eggs (4 medium range)
  • butter (250 gr) 
  • plain Greek yogurt (1 cup)
  • granulated sugar (1 cups or brown sugar, or even honey)
  • baking soda (1 teaspoon)
  • vinegar (1 teaspoon)
  • salt (a pinch)
  • vanilla (1/3 teaspoon, the vanilla I am using is in a granulated form, you can freely use vanilla extract 1 teaspoon will be enough)
  • caster sugar (just enough to sprinkle on top) 
Now let's talk about the instructions.
  • First of all preheat your oven to 180 degree Celsius. 
  • Take a deep bowl and mix together butter, cottage cheese and the the granulated sugar with an electric mixer, or even with a regular whisk (you can also use a regular fork). 
  • Then add the baking soda into the Green yogurt and mix it. It will immediately start to bubble. Add it into the butter and sugar mixture and whisk it again. 
  • Then add a pinch of salt, the vanilla, mix it again and gradually mix in the flour to get a batter with a thick consistency.
  • Layer some baking paper on your cooking sheet and spoon the batter to make individual cookies. Make sure to leave enough space for the cookies to expand. Repeat these actions with all the batches. It will make several batches depending on how small or big you make your cookies.
  • Bake the cookies in the oven for about 25 minutes or until they get yellowish-golden color. let them cool down on a cooling sheet. Then sift some caster sugar on top and serve. :) :) :) 


I hope you like this simple but very tasty cookie recipe! Have a fabulous day! Bye! :) :) :)

Flag Counter

Wednesday, May 6, 2015

Cottage Cheese and Sesame Cheese-Balls


Hello everyone! Today I decided to share this simple but very delicious cottage cheese and sesame cheese-ball recipe! These palatable and scrumptious cottage cheese and sesame cheese-balls are on the top list of my favorite appetizers! They can be prepared for different occasions, for parties, baby showers, birthday parties!!! You can easily make them the night before and serve them the next day. It'll save you lots of time and energy. They can also be used for breakfast and lunch with pieces of toasted bread (naan bread). I personally enjoy eating them with traditional Armenian bread lavash. You can also make a burger with them, adding a few slices of tomato, cucumber, pepper, onion and other vegetables. In other words they are very versatile. These is how my platter of super delicious and healthy cottage cheese and sesame cheese-balls look like!!! I think they look very appetizing!!!:) :) :) 


Now let's talk about the recipe. You will need the following ingredients:
  • cottage cheese (300 gr)
  • cheese (200 gr)
  • sour-cream or plain Greek yogurt (200 gr) or you can use strained plain yogurt
  • garlic (2-3 cloves)
  • sesame seeds (1 cup)
  • dill (1 tablespoon of chopped dill)
  • salt (just a little bit)
  • White pepper (1/3 teaspoon)
Now let's talk about the instructions:
  • First of all you should is to grate the cheese and chop the garlic and the dill. I am using cheese from a local producer, thus I am not going to name the brand, I don't think you can find them in your country, unless you live in Armenia. Just choose the cheese the taste of which you like the most. 
  • In a deep bowl mix together the cottage cheese, grated cheese, sour-cream and garlic. You should get a substance of a thick consistency to make small ball of it.
  • Pour the sesame seeds in a flat plate. Make small balls from that mixture and roll them in the sesame seeds. Repeat the same action until you have done with the mixture. 
  • Place the ready cottage cheese and sesame cheese-ball in a flat container arranging them only in one layer, cover the container with the lid put it in the fridge. 
  • The next day you just take them out of the container, place them nicely in a plate and serve them. I usually serve them wrapped individually in a lettuce leaf.

I truly hope you like these cottage cheese and sesame cheese-ball recipe as much as I do. Have a fabulous day. Bye!!! :) :) :)

Flag Counter

Sunday, May 3, 2015

Roasted Young Potatoes with Celery, Garlic and Celery omelet with Croûtons

Happy Sunday to everyone!!! I hope you all have a fabulous day today!!! Today's recipe was a mere experiment in the kitchen and, honestly, to my great surprise it turned out fantastic. I don't know why I haven't used celery previously in different recipes. I haven't even expected it to go so well with potatoes or as an ingredient for an omelet! Here in Armenia, celery is mostly used as an inseparable ingredient in picked vegetables, but never in meals. I've always known that the celery was a very healthy vegetable but didn't know how to incorporate it into my diet. Earlier today I asked my husband to do some grocery shopping and together with all the food he brought a bunch of celery instead of spinach (hahaha .... yes, you are right, he confused it somehow, I can't imagine how a person could possibly confuse spinach and celery, but anyway, he is hilarious :) :) :). To cut the story short, I decided to prepare something with that bunch of celeries and prove it to him that I can make something delicious even with celeries. To tell the truth I wasn't completely sure if it would turn good enough to write a recipe post about it, but to my great surprise it turned out awesome. I am glad I took pictures of it. The dinner was approved by all the members of my family!!! If you have never tried anything like that before I recommend you to try it. I assure you, you'll be pleasantly surprised!!! The celery gave the potatoes and the omelet a very delicious and piquant flavor. From now on I am going to buy celery more often to experiment with it and find more ways of incorporating it into my diet. This is the final look of the ready meal.  If you are interested how I cooked it, just keep on reading the recipe below! :) :) :)


Now let's talk about the recipe. You'll need the following ingredients for the meal.
  • young potatoes (1 kg)
  • celery ( 2 cups of chopped celery stems, don't throw the leafy parts, we are going to make a delicious omelet with it :) :) :) 
  • eggs (4 medium range)
  • garlic (5 cloves + 2 cloves for the omelet)
  • coriander (2 tablespoon of chopped coriander)
  • green (spring) onions (2 tablespoon of chopped green onion), you can also use a regular onion
  • vegetable oil (4 tablespoon + 2 tablespoon for the omelet, if you think this is not enough you can use more, just use as much as you are used to)
  • salt (to your taste)
  • black pepper (1/2 teaspoon, use more if you feel like it)
  • paprika (2 teaspoon)
  • chili (1/2 teaspoon, you can use more)
  • cumin (1 teaspoon)
  • wholewheat bread for croûtons (8 slices) 
This meal will serve about 4 portions.


Now let's talk about the instructions:
  • First of all wash the young potatoes under warm water and scrub it thoroughly as we are not going to peel them. If the potatoes are not even in size, cut the big ones in half so that they get cooked during the same amount if time! 
  • Drizzle the pan with vegetable oil, put in on the heat and add the potatoes. season them with salt, black pepper, paprika, chili, cumin, give them a good stir and cook them under the lid for about 15 minutes. Stir them from time to time. 
  •  Meanwhile chop the celery stems into 3-4 centimeter chunks. Keep the leafy parts, don't throw them as we are going to make an omelet with it.

  •  When the potatoes are half cooked add the chopped celery and the garlic cloves cut in halves. If you are using regular onion too, add the chopped onion, as well. I am not using onions because some of my family members, can't tolerate it. If I were cooking only for me, I would have definitely added onions to it. Then I added a little bit of more paprika, as I love the taste of it so much. :) :) :) 

  • Cover the lid and cook it for another 15 minutes on a low heat. After 15 minutes or so, open the lid and roast the vegetables with he lid open until they get perfectly roasted. Be careful not to burn the garlic. It has a tendency to get burned very easily. And hen it is burnt it can spoil the dish by its bitter taste.  

  •  Meanwhile chop the leafy parts of the celery the coriander and the green onions to make the omelet. Start preparing the omelet while the potatoes are being roasted, so that the potatoes and the omelet get cooked on time to be served together. 


  •  Drizzle another pan with vegetable oil, heat it a little bit and add the chopped garlic cloves (you can also add chopped onions if you like sautéed onions) and roast them a little bit. Then add the celery leaves, a little bit of coriander and green onions and cook under the lid for a few (2-3) minutes. Turn the heat off and let it cool down a little bit. Meanwhile whisk the eggs with a little bit of salt, black pepper, chili, and paprika. Add the cooked celery leaves into the egg mixture, stir it thoroughly and pour it back into the heated pan.  

  •  Cook the omelet for a few minutes as you usually cook an omelet. Make sure you have cooked it through.
  • As you cook the celery omelet, keep an eye on the potatoes and make sure you don't burn them. As you finish the omelet, the potatoes and celery stems must be perfectly roasted. Turn off the heat and sprinkle them with chopped coriander and green onions.


  •  Everybody in my family loves croûtons, so I decided to prepare some to go with the meal. To prepare croûtons, all you have to do is to roast the bread slices on a pan drizzled with a little bit vegetable oil.  And voilà, the dinner is ready! This is how my plate looked. A piece of omelet, a bunch of roasted young potatoes and celery stems, croûtons and a little bit of ketchup. 


I hope you will like this meal as much as liked. :) :) :) I hope you had a lovely weekend! :) :) :) Bye!


Flag Counter